
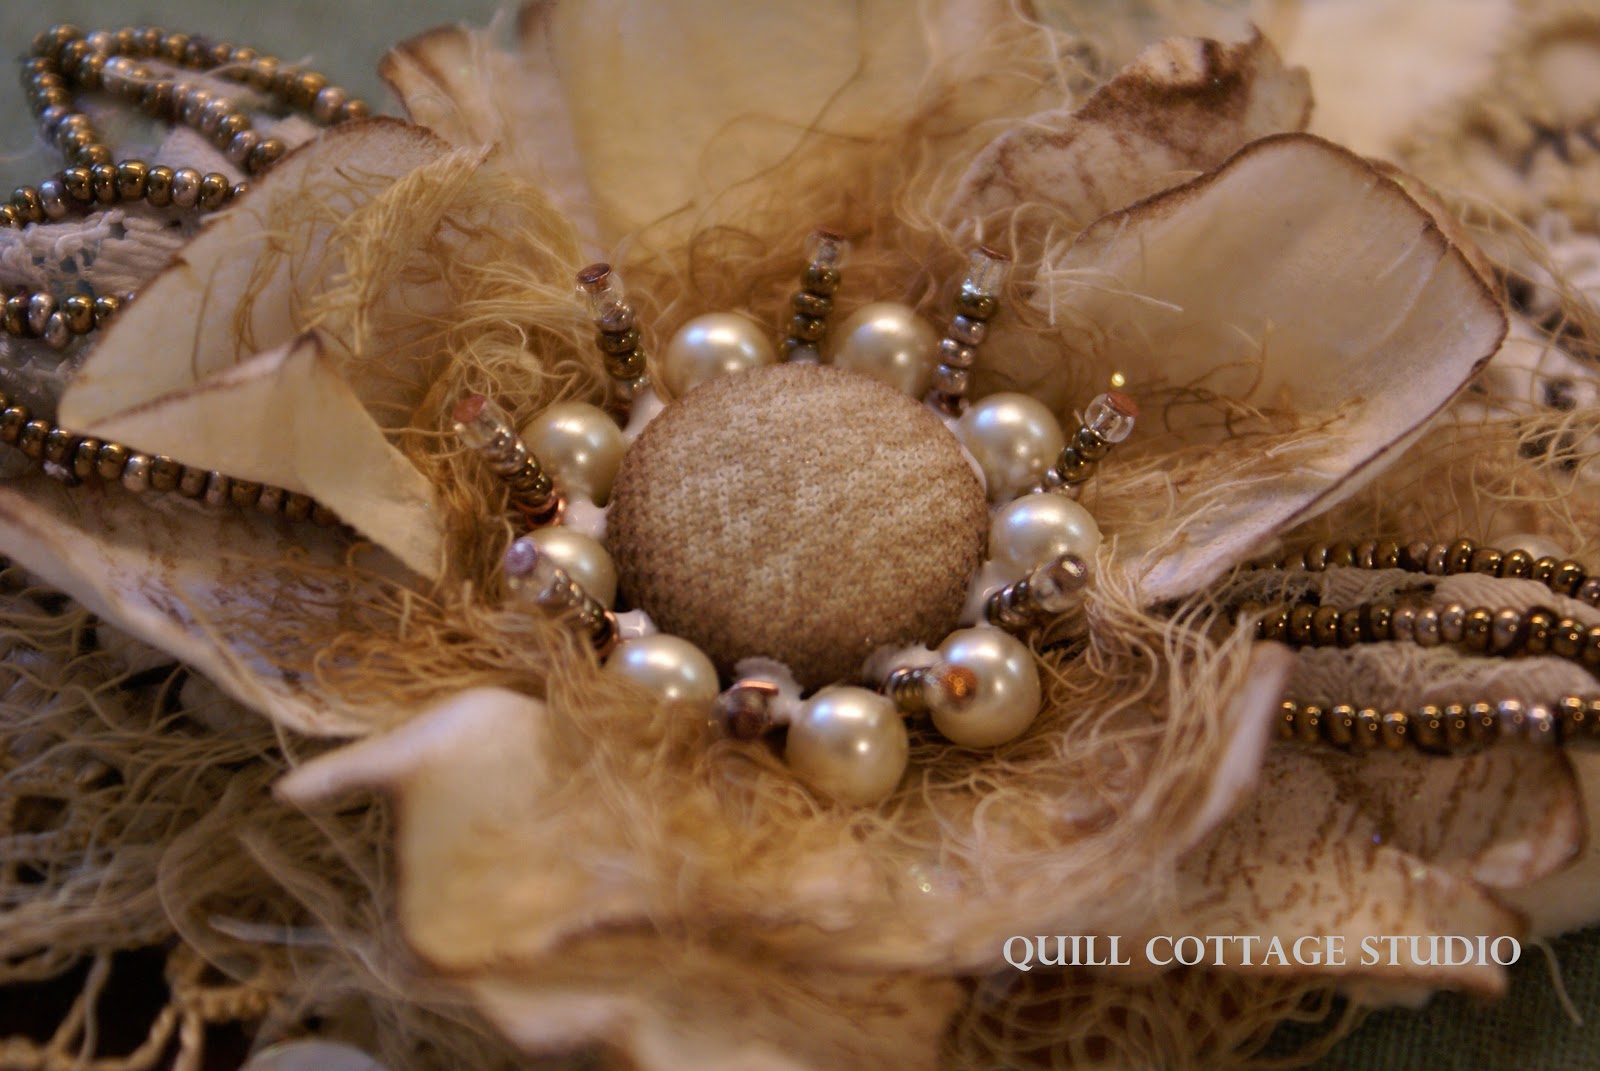
.JPG)
Enjoy!
MATERIALS:
* Small alphabet stamps
* StazOn Ink ( I used Saddle Brown)
* 1 yard lace of your choice
* Extra dyed cheese cloth from week 3
* Scissor
* 2 inch by 9 inch piece of flannel fabric
* 2 inch piece of 1 inch wide sew on hook and loop tape (Velcro)
FINISHING TOUCHES
Measure your cuff base and cut a piece of soft flannel the size of your cuff set aside for a later step:

Cut a piece of left over dyed cheese cloth the length of your cuff and a little wider on both sides:
FINISHING TOUCHES
Measure your cuff base and cut a piece of soft flannel the size of your cuff set aside for a later step:

Cut a piece of left over dyed cheese cloth the length of your cuff and a little wider on both sides:

Cut 5 more pieces of cheese cloth the same size as in the step above and layer them on top of each other:

Place your cuff face down on a protective surface then run a bead of clear drying craft glue all around the edges and swirl it across the middle of the cuff (yep, I am a messy stitch-er):

Using your yard of chosen lace lay lace onto the bead of glue around the edge so that it extends beyond the edge of the cuff, trim away excess lace then put a bead of glue on top of lace as shown below:

Gently center glue side of cuff onto the stack of cheese cloth layers and gently press cloth down into glue until it seeps through to the outer layers of cheese cloth, allow to dry:

Once cuff is completely dry run a bead of craft glue around the edges of your flannel piece and through the center:

Place the glue side of the flannel against the back side of the cuff and gently press into place, allow to dry:

Once fully dry trim edges of cheese cloth on both sides of the cuff, they should extend just beyond your lace trim:
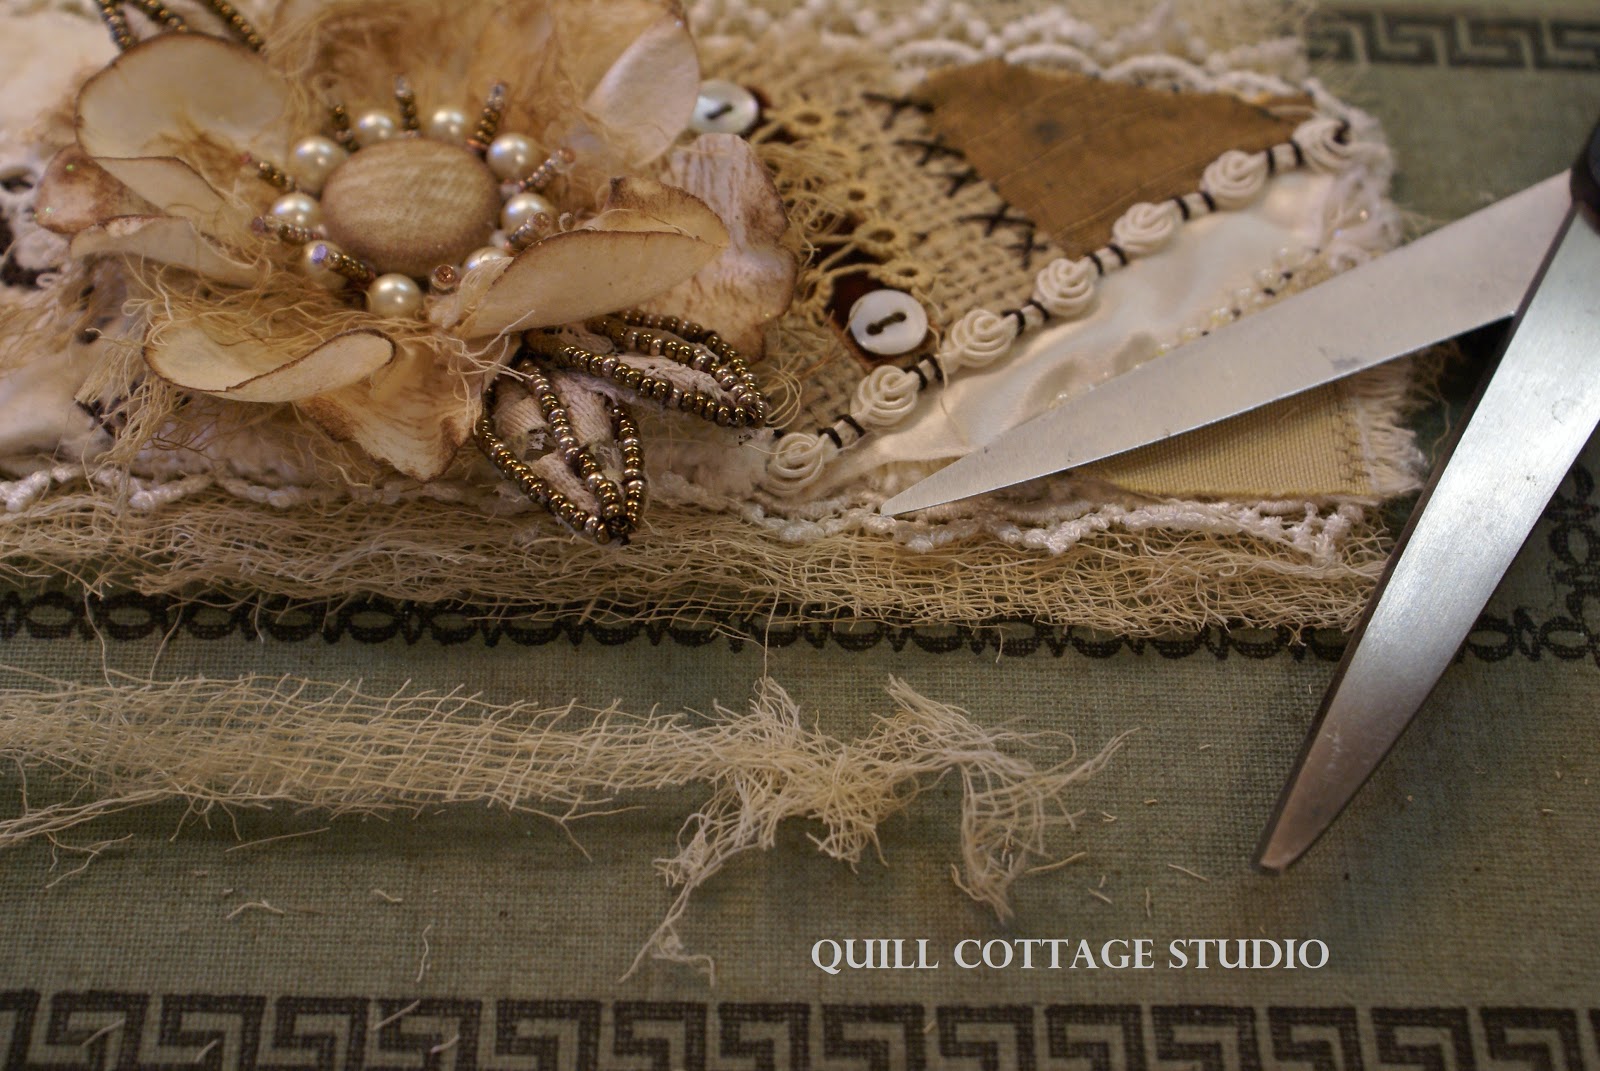
Gently pull the raw threads loose on both cuff sides leaving a fringe of cheese cloth:

Trim away pulled threads:

Gently scruff the edges of the cuff to fluff fringe apart, ink fringe edges if desired with permanent ink pad:

Tear a 1/2 inch strip of muslin and stamp with an affirmation or descriptive word using permanent ink, ink the edges of the strip, allow to dry. Once dry lightly rub a small amount of clear drying glue across the fabric, allow to dry, repeat on back side to prevent fraying, Other stamping ideas might be a favorite Scripture reference, monogram initials, a name, etc. this is just a tiny place to convey a message to the wearer:


Place craft glue on back side of both pieces of hook and loop tape:

Glue the rough side of the hook and loop tape to the top of one end of your cuff as shown below:

Glue the soft side of the hook and loop tape to the opposite end under side of your cuff as shown below and allow to dry:


Once completely dry run a little bead of glue on the outside tab of your cuff:

Glue your affirmation or descriptive word to the cuff, make sure the word is facing the cuff as shown below:

Run another bead of craft glue across the entire end of the cuff over the affirmation tab:

Top this bead of glue with a snippet of lace or trim and allow to dry:

Once your cuff is complete the affirmation tab should be readable by the wearer when worn, a reminder of whatever message you want to deliver:

Congratulations, give yourself a hand your cuff is complete!
.JPG)
Thank you for following along and I can't wait to see all the
creative cuff ideas you come up with so please do share them with me. I
hope you have enjoyed making this for yourself, as a gift(s), or even to sell in your
shop or at shows.
blessings,
Sandy
Well done Sandy! Your tutorial and pictures are absolutely perfect in every detail. The amount of work this tutorial must have been is mind blowing, THANK-YOU!!!! Can't wait to get started, just have to gather all my supplies and jump in. Have a wonderful day.
ReplyDeleteHugs,
Robin
WOW, what a wonderful job you did in putting these tutorials together. The cuff is magnificent. Thank you
ReplyDeleteI just found you via Pinterest. What an amazing class! I can't wait to try this out. I have a full plate the next 2 weeks, but this is going to be brewing in my mind until I get a chance to make one! Thank you for an amazing share!
ReplyDeleteI just found you via Pinterest. What an amazing class! I can't wait to try this out. I have a full plate the next 2 weeks, but this is going to be brewing in my mind until I get a chance to make one! Thank you for an amazing share!
ReplyDeleteThank you so much for this tutorial. Very well done, very clear and easy to understand. Have been wanting to try this, but did not realize all of the techniques involved. Very inspiring. Thank you! Hugs, Catherine
ReplyDeleteHi Sandy, this is an amazing tutorial. I have been trying to figure out how to go about making one of these bracelets and your tutorial just answered that question! I cannot thank you enough for taking on this huge project and sharing it so freely with us! I know how much work it took to get it recorded on film (er, what do we call a digital record? giggle, I guess a digital record :D), and uploaded to your blog!!! Thanks ever so much for all the hard work that turned into the beauty of this tutorial!!! Hugs from a new follower of yours, Beth P
ReplyDeleteSandy, I've had a lot of fun making my first crazy quilt. I've read and looked over your excellent tutorial many times. Thank you. Charlotte
ReplyDelete