
In preparing this class I have tried to anticipate, illustrate, and address any quirks you might encounter in the Crazy Quilt piecing process since you don't use a pattern, the main thing is to remember that this is a free form sewing art so you cannot mess it up. The background of this piece will not necessarily look "pretty" when you finish it, remember, its all in the details that will follow that will bring the piece together.
Relax, enjoy, have fun!

The main supply lists for the entire class can be found on the introduction page but for ease of convenience I have also included individual lists in each lesson, feel free to substitute any materials with what you have on hand. I have included specific brands and links for those who want to know exactly what I used in this project but do not feel it is necessary to follow suit. Remember, make it your own!
To get started you will need the following:

* 9 inch by 6 inch piece of cotton canvas
* Small scraps of fabric of your choice
(
I used bridal satin, duponi silk, burlap, cotton batting, satin acetate
lining, and a piece of a favorite old fisherman's knit sweater)
* Needle and Thread (sewing machine if you prefer)
* Scissor
* Sewing Pins
* Iron
Read through all the instructions before beginning to get an understanding of the process.

Tear or cut a 9 inch by 2 inch strip of cotton canvas.
Since this is a soft cuff construction that does not use a metal cuff blank for support you need to use a heavy weight fabric such as cotton canvas for your base or your cuff will not support the embellishment.

Select some of your favorite fabric scraps, you will want to select 8 or 9 different fabrics.
Don't limit yourself to neutrals if that is not your style, go crazy with color and personalize this project to your tastes, some suggestions are old vintage doilies for an all over lace look, vintage handkerchiefs for some spectacular floral fun, lush velvets and silks for an opulent look, or how about down home denim and burlap for country cutie chic.
Don't limit yourself to neutrals if that is not your style, go crazy with color and personalize this project to your tastes, some suggestions are old vintage doilies for an all over lace look, vintage handkerchiefs for some spectacular floral fun, lush velvets and silks for an opulent look, or how about down home denim and burlap for country cutie chic.

To start building your crazy quilt background, cut a small triangle of one of your fabrics
Lay the triangle right side up on one corner of your canvas base as shown above.

Flip the fabric face down, keeping it lined up so that when you sew the seam and fold it back towards the corner it will match the canvas edge, pin in place
NOTE: I used a dark thread for teaching purposes so you could see the stitching, you will want to match your thread to your fabric.

Thread a needle or sewing machine with thread matching your fabric and sew across small triangle leaving a very small seam allowance, remove pins, and clip excess threads.

Using proper setting on your iron for fabric type, press the triangle back towards the corner, and pin in place.
NOTE: For demonstration purposes and ease of photographing I have used a small craft iron in the photos, I do not recommend that you use this is the pressing of your fabrics as it does not have a temp setting that is adjustable to various fabrics and might scorch your piecing.
NOTE: For demonstration purposes and ease of photographing I have used a small craft iron in the photos, I do not recommend that you use this is the pressing of your fabrics as it does not have a temp setting that is adjustable to various fabrics and might scorch your piecing.

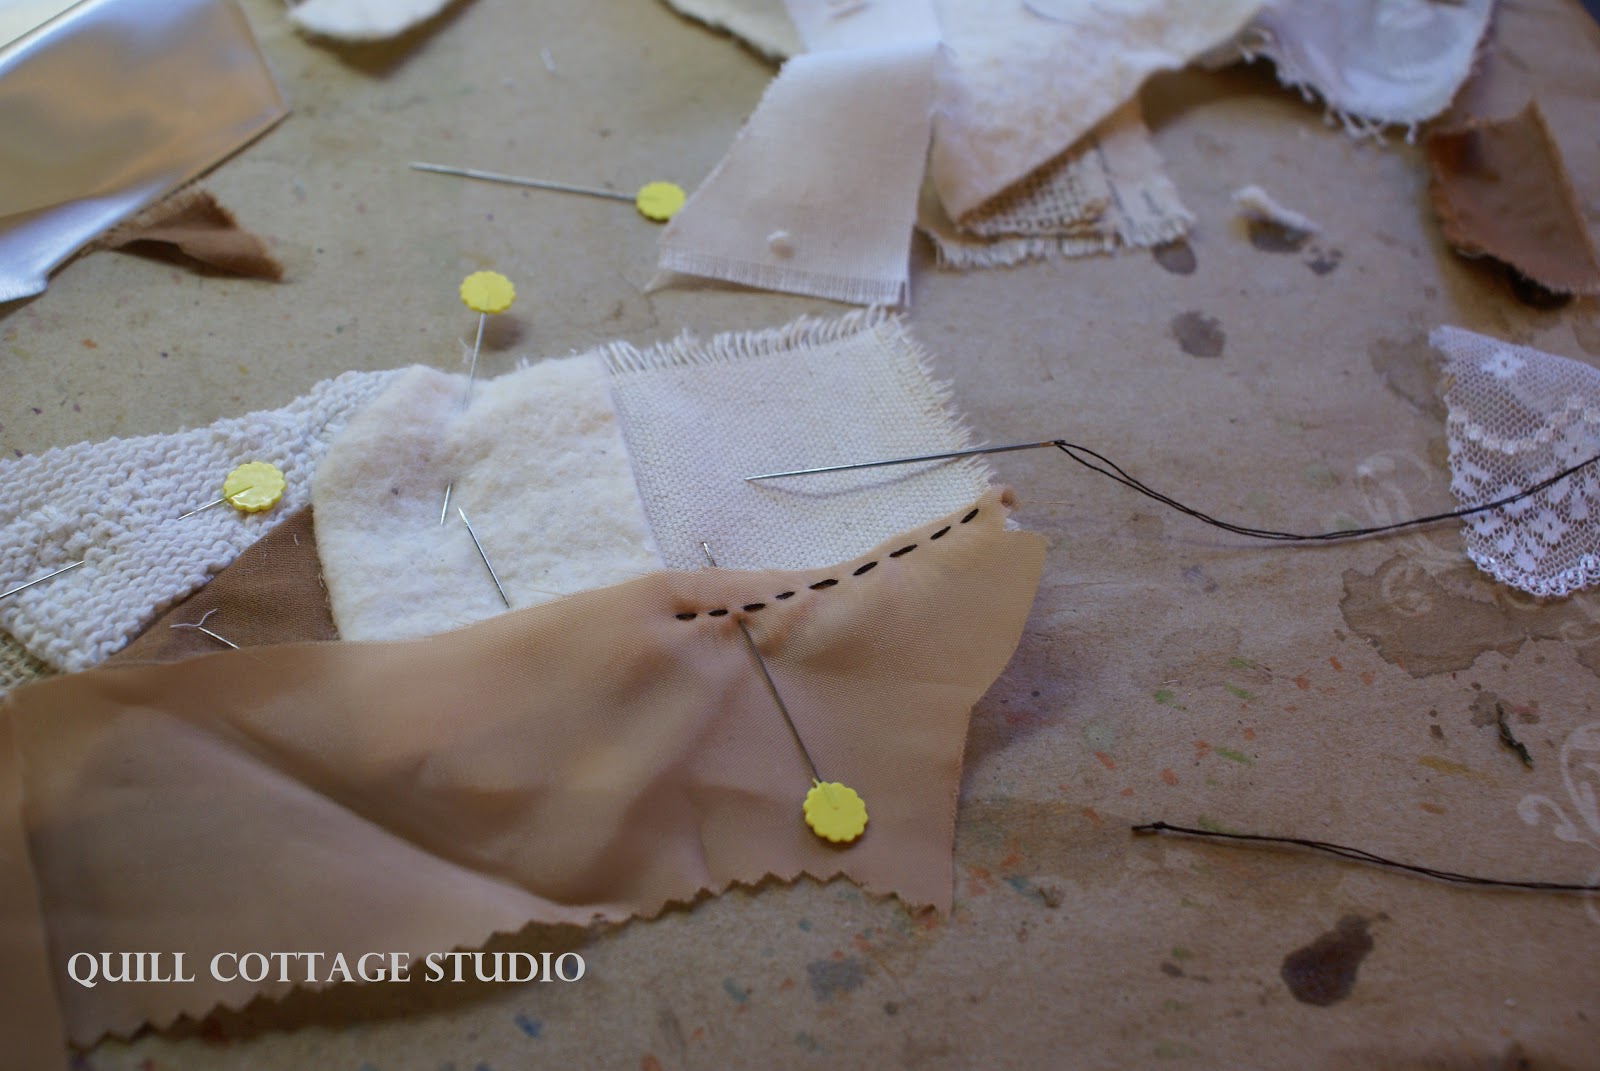
Select another scrap of fabric, lay the right side of the new scrap against the right side of the first piece and pin in place.

Stitch fabric in place stitching right up against the first piece of fabric, remove pins, and clip excess threads

Iron seam and pin in place.
Remember Crazy Quilt piecing is not a precise placement other than to have the seams sewn butted up against one another, take a look at the examples below in this piece of this antique pillow top, you will notice the irregularity of fabric shapes and placement.
Remember Crazy Quilt piecing is not a precise placement other than to have the seams sewn butted up against one another, take a look at the examples below in this piece of this antique pillow top, you will notice the irregularity of fabric shapes and placement.


Your placement may not look exactly like mine but it is not supposed to since this is not a precise pattern so don't get anxious and just let your unique design unfold.

Clipping the excess fabric as you work will help you to better visualize your design and your piecing placement rather than trying to work with the extra bulk and sight distraction of fabric hanging off the edges.


Continue ironing, pinning, and piecing...


Your cuff base should be looking pretty patchy by now...


You can see my open seam at the point of my scissor below between the cotton batting piece and the satin piece...


You are...


Your cuff base may have become somewhat distorted in shape due to the irregular piecing and stitching, no worries here either, turn your cuff over so you can see your backing piece, simply even it back up by trimming any uneven edges and you are ready for the next lesson!
In the next lesson we will be adding textures and layers through fiber, embellishments, and stitching.
blessings,
Sandy
Great tutorial Sandy! Every step is laid out beautifully and your pictures speak volumes. Can't wait to get started on mine. Happy Friday!
ReplyDeleteHugs,
Robin
Oh wish that I could go along in real time! I'm so glad for my iPad that can go along with me to the sewing room, though. I use this method to make some of my needlebooks so I should be all set. Maybe. I also chose something too flimsy for the base so will have to find something sturdier. Thanks, Sandy!
ReplyDeleteOh sandy, this is amazing. I just finished my base piecing. I can hardly wait for the next lesson.
ReplyDeleteThis has really inspired me to make a cuff. Got all my fabric scraps together and getting ready for the sewing bit now.......... yikes.
ReplyDeleteOne of the best decision i ever made was contacting Dr Otonokpo to help me get my lover back, I was life filled with happiness after i contacted Dr Otonokpo because he didn't just bring my lover back to me he also made our love for each other more unique and superb. If you need to spice your relationship with more love and attention contact Dr Otonokpo on his Email Address otonokpotemple@gmail.com, call/whatsapp him via his contact +2348114129781 and be happy just like i am, thanks Dr Otonokpo for your great work.
ReplyDeleteOne of the best decision i ever made was contacting Dr Otonokpo to help me get my lover back, I was life filled with happiness after i contacted Dr Otonokpo because he didn't just bring my lover back to me he also made our love for each other more unique and superb. If you need to spice your relationship with more love and attention contact Dr Otonokpo on his Email Address otonokpotemple@gmail.com, call/whatsapp him via his contact +2348114129781 and be happy just like i am, thanks Dr Otonokpo for your great work.