
In this lesson you will be learning how to add layers and texture using fibers, trims, and simple stitchery. This subtle layer will add depth, dimension, and great detail to your cuff base.
.JPG) LESSON 2 ADDING LAYERS AND TEXTURE
LESSON 2 ADDING LAYERS AND TEXTURE
MATERIALS:
* Scraps of lace, trim, and fiber
.JPG)
MATERIALS:
* Scraps of lace, trim, and fiber
*
Embroidery Floss to match your fabric choices, you can use one single
color or more than one color as you change to various stitches OR thread
to match your project if you choose to use a sewing machine that has a
variety of decorative stitches
* Embroidery Needle
* Scissor
* Misc. embellishments such as buttons, beads, etc.
* HeatnBond iron on adhesive hem tape OR Aleene's Original Tacky Glue
(You
can get these products at most craft/hobby stores or big box stores but
just in case I have listed the links to purchase them online)
I chose to use a simple Stranded Cotton embroidery floss, which is a versatile thread suitable for most embroidery. You may wish to select a different texture or sheen of floss. Some suggestions are Stranded Silk which had a more luxurious sheen, Pearl Cotton which is a glossy thread, Soft Embroidery Cotton which has a really soft or muted appearance, Metallic Thread which will give your piece a shiny bit of bling, or even French Wool (also called Crewel Wool) which is a very delicate thread that will give your work a more tapestry feel.

NOTE: For demonstration purposes throughout this tutorial I have used a dark contrasting floss so that you would be able to see the stitching. This is not necessary, you may want to use a contrast floss, a matching floss for a more tone on tone look, or a mixture of floss colors on your piece.
Most embroidery floss comes in a four to a six ply strand. This means there are 4 to 6 strands of thread twisted together to make up the floss skein. For this project we will be separating the strands as described below. While it is suitable to use a fully twisted skein of floss for this project we want to achieve a finer detail work without the bulk. Since the strands will not be twisted they will cover better and stitch more smoothly.
Stranded cottons, wools, and silks may be easily separated and the strands used singly, or combined to make the required thickness.
To separate:

Cut an 18 inch length of floss, then with the end of your embroidery needle splay the strands apart

Hold the strand between your thumb and finger with splayed ends showing, gently pull one single thread free from the strand, straighten out the floss and repeat until you have each ply separated.
We will be working with 3 ply, gather three of the threads

Knot one end of the three ply strand and thread the other end through your embroidery needle leaving a 2 inch tail, and you are ready for stitching.
Before moving on to the next step I have provided an embroidery stitch guide below demonstrating the basic stitches I used on the sample cuff. I used six stitches on this project, a Triple French Knot, Chain Stitch, Feather Stitch, Back Stitch, Cross Stitch, and the Lazy Daisy or Detached Chain Stitch, singly and in combination with one another to enhance my crazy quilt piecing. Feel free to use these or improvise your own stitches.
EMBROIDERY STITCH GUIDE:
CROSS STITCH:
Working from the back side of your fabric, draw your needle up through the fabric( until the knotted end of your floss rests against the back of your fabric) and back down again working from the lower right to the upper left creating one half on an "X". Pull the thread up through the back of the fabric this time working from the lower left up to the upper right completing the "X". Repeat as required to complete a row of stitches then knot the thread on the back side of the project and snip away excess to complete:


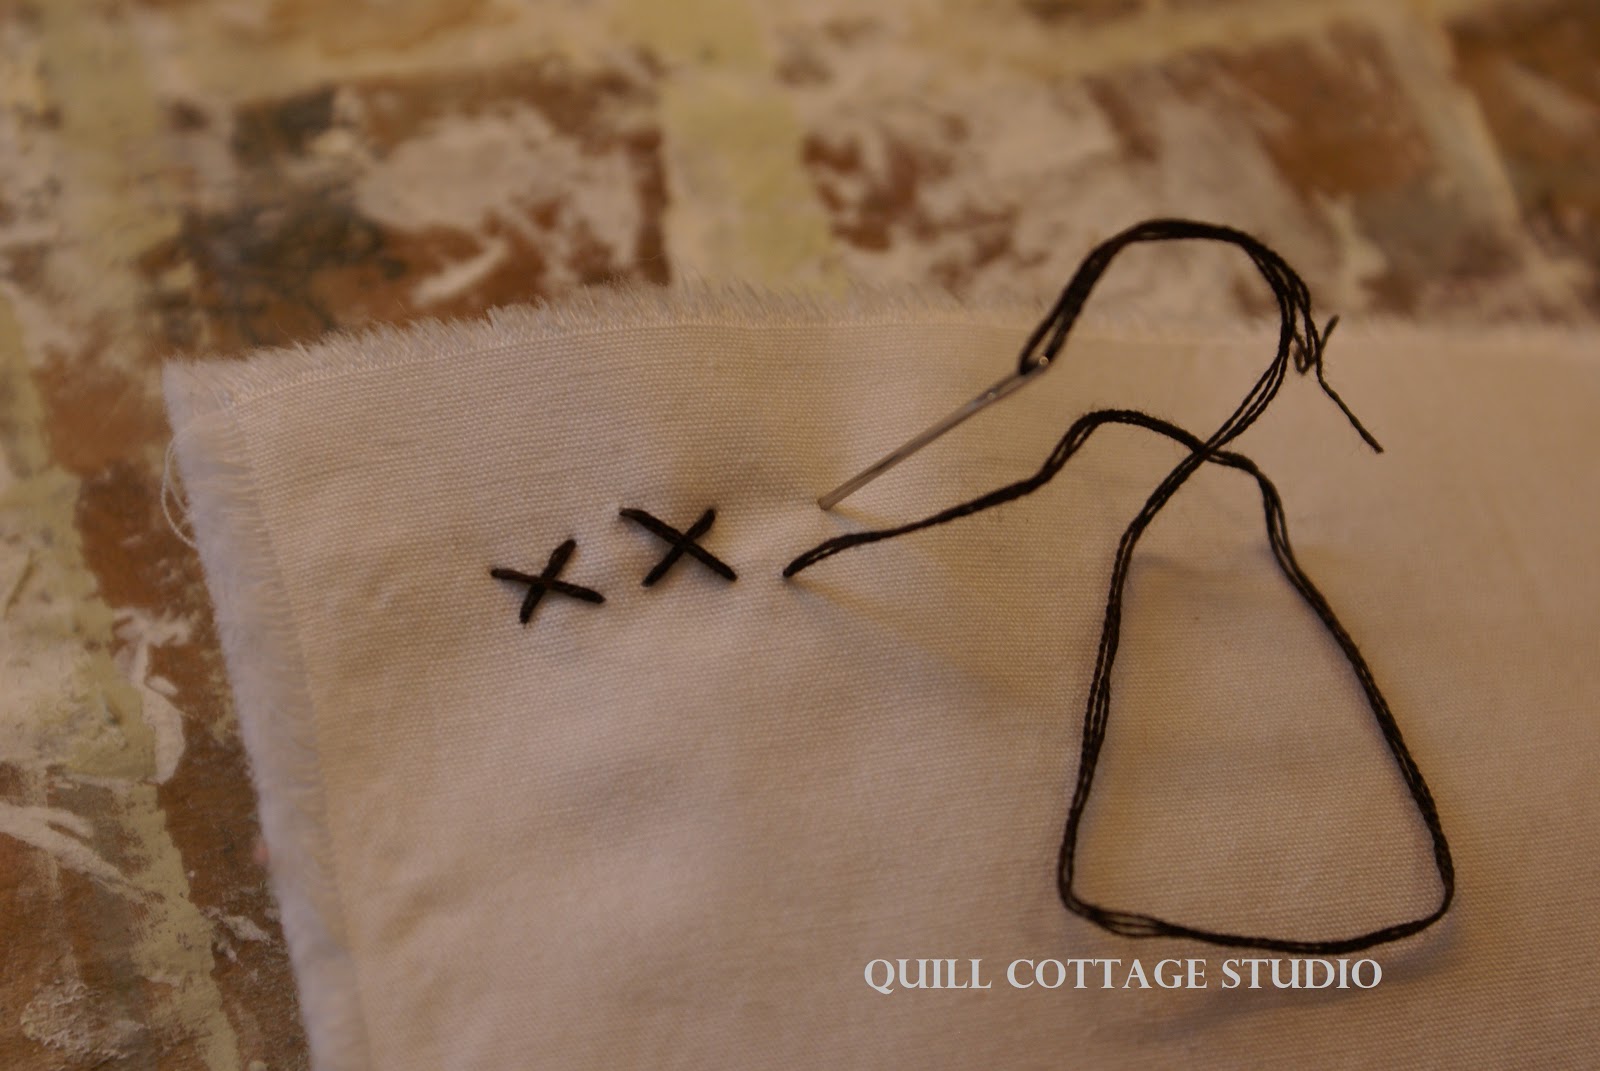

Please note the irregularity of my stitching throughout these stitch guides, you can strive for perfection of that is your cup of tea but I prefer a more rough handmade look to my handiwork.

TRIPLE FRENCH KNOT
Working from the back side of your fabric, pull your thread through until the back knot rests against the back of your fabric. Wind the three ply floss around your embroidery needle three times as shown below:

Push the point of your needle through the same hole you drew your thread up through then gently pull on the floss until it makes a knot at the point of your needle and hold thread in place between your thumb and finger as shown below:

Gently pull the needle all the way through and you will have a French Knot! Repeat as required to enhance your design. When finished making knots tie off thread on back of project and snip away excess thread to secure stitching.

CHAIN STITCH:
Working from the back side of your fabric, pull your threaded embroidery needle through until the knotted end rests against the back side of your fabric. Push the needle back down through the same hole you came up through:

Leave a little loop the size you want your chain stitch to be. You can adjust the size of your chain design by either increasing or decreasing the size of the loops:

Draw your needle back up through your fabric coming up on the top inside of the loop:

Repeat the first step by pushing the needle down through the same hole you just came up through and gently pull until you have made a second loop the same size as the first one:

Repeat this process making a chain of stitches until you have completed your chain, knot thread on the back side of your project and snip away excess thread:


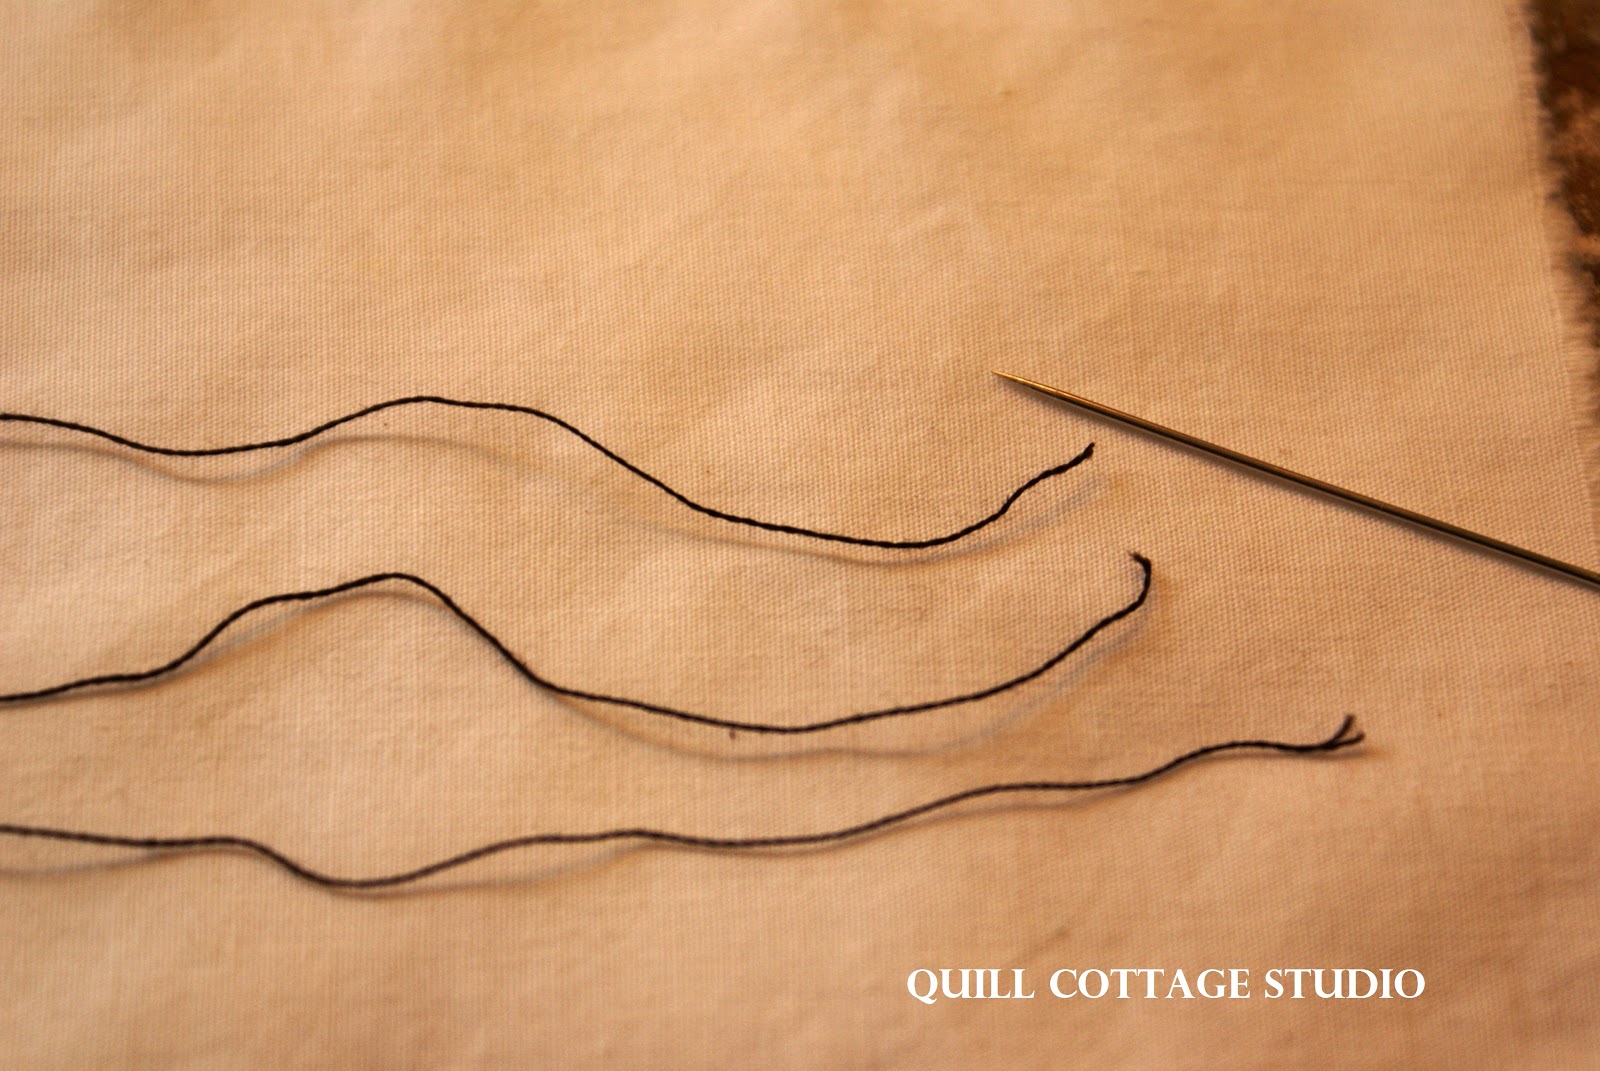
Pull your three ply floss up through the back side of your project until the knot end rests against the fabric. Determine how long you want your straight stitches to be and take one stitch by pushing the needle back down into the fabric. Skip a space the same size as your first stitch and come back up through the fabric and back down into the hole of previous stitch:

Repeat this process until you achieve a row of back stitching as desired then knot on back side of project and snip away excess thread.


VINE OR FERN STITCH:
This stitch is made up of a combination of the back stitch and the lazy daisy or detached chain stitch. To begin the stitch make a row of back stitch as described above then come up through the back side of your fabric where the back stitches join together and place the point of your needle back through the hole you just came up through:

Gently pull the thread from the back side until you have a loop:

Draw your floss up through the inside of the loop and back down through the project surface on the outside of the loop:

This will lock your stitch into place, go back to your starting point and repeat the process as described above on the opposite side of the back stitching:


Move down to the second joint of the back stitching and repeat going from side to side and working down until you have a leafy vine effect or fern effect. Once complete, knot thread on back side of project and snip away excess thread:


FEATHER STITCH:
Draw the knotted floss up through the back side of your project and back down again to form one half of an "X" working from bottom left to upper right:

Straight up from your previous stitch draw your floss up through the back side of your project:

Then down again forming the feather lines as shown below, repeat until you have the desired length of stitching:

To begin the second side of the stitching push your needle up through the same hole as the last stitch you made as shown below:

Then begin working in the opposite direction to create a feather effect:

Continue working down the other side (ignoring that first wonky stitch I did in the demo) until you get to the bottom:

I used this stitch in combination with the chain stitch as shown below, I have used two colors of floss so you can see the different combination of stitches:


Now, before we get started on the stitching, let's talk lace. I have a dear wonderful friend who does tatting and crochet. She is always testing patterns or making her own lace designs. She generously donates her test pieces to me and I have used some of those to embellish my cuff:

Not to worry if you don't have a resource like that, you can easily use commercial lace to get the same effect by snipping away little bits of the design and combining them to get your desired effect:


Lastly, you will need some layering embellishments such as thick fibers (yarn), lace, trim, beads, etc. I used the pieces pictured below:

Ready to stitch?
Traditional Crazy Quilts have embellished outer seams with the most common decoration of embroidery. We will combine traditional embroidery with fiber embellishment to add rich texture and layers to the base of our cuff. The stitch sample below demonstrates how I attached my trims and fibers using the stitches as described above.

A piece of chenille yarn was over stitched with a simple cross stitch, a strip of lace was tacked on with a row of triple French knots, rosette trim was tacked in place with simple straight stitching as were the beaded trim.
I embellished each seam of the piecing with a varied stitch intermixed with trim and fibers. This is where you get to be creative and put your personal touch on the design of this project. I have included detail photos at the end of the directions of various seam stitching and embellishment.
~IMPORTANT STEP~
CUFF TEST
Before you move on to placement and stitching of your lace embellishments you need to do a cuff test. Wrap the cuff around your wrist making sure you have enough over lap on the inside of your wrist to accommodate the width of your hook and loop closure. Trim if necessary. While cuff is around your wrist locate the top center of your cuff and mark it by placing a safety or sewing pin where your central embellishment will be. Also use a pin to mark where overlap of the closure comes to on the cuff.

You are then going to place your lace embellishments on both sides of the blank center.
You will also want to keep the bottom side of the closure overlap embellishment free so the closure will lay flat. The photo above shows an unadorned center with lace embellishment on both sides.
Grab your floss, lace, trim, buttons, beads, etc. and have fun!

Cross stitch seams, tacked down rosette and bead trim, tatting tidbit with velvet ribbon and mother of pearl buttons

Triple French Knot tacked lace, snippet of tatting tacked in place

Feather and Chain stitch seam, Fern stitch seam, chenille yarn and cross stitch seam, tacked down tatting with French knot embellishment

Above you can see the blank space I left for my central embellishment

Above is the outside overlap of my cuff closure with a little bit of embellishment

Above is the inside of the closure overlap, just decorative seams with no extra embellishment. A few more up close details below:


FINISHING OFF THE EDGES
At this point most of the base will be really secure but you will have some loose edge pieces as shown below:

Pinch off pieces of your HeatnBond hem tape and place between any loose edge layers then using the proper recommended setting on your iron press to seal edges. You can use tacky glue or fabric glue to secure your edges but BEWARE even though these glues dry clear if you are using a delicate fabric such as silk or satin or even some cottons the glue will bleed through and leave a dark stain mark when dried:


The next lesson will cover making the central floral embellishment and hand beaded details. There are some optional mini tutorials included in the next section to give you ideas and options for creating your custom cuff.
Enjoy!
blessings,
Sandy
Fantastic! Thank you so much for getting this next step done so quickly.
ReplyDeleteThe way you've tacked on the laces and embellishments is really cool. I think it would make for a lovely evening of hand work.
ReplyDeleteWhat beautiful work, Sandy. I love the stitches that you used. Thanks again for such a beautiful and well-written tutorial. I hope that you're having a great weekend. XO Sue
ReplyDeleteThis is wonderful Sandy. Very nicely done step by step directions. Thank you.
ReplyDeleteSo gorgeous, each picture has such wonderful detail and instructions that are clear and easy to understand.
ReplyDeleteHugs,
Robin